Chapter 11: Docker Swarm
1. Introduction
Docker Swarm is a cluster management tool officially provided by Docker, whose main function is to abstract several Docker hosts as a whole, and manage the various Docker resources on these Docker Hosts through a single input. Swarm and Kubernetes are similar, but lighter and have fewer features than kubernetes.
is a docker host cluster management tool
Officially provided by docker
docker version 1.12 onwards
It is used to unify cluster management and to schedule the resources of the whole cluster
Lighter than kubernetes
Scaling up or down
Rolling update or version rollback
service discovery
Load balancing
Routing mesh, service governance
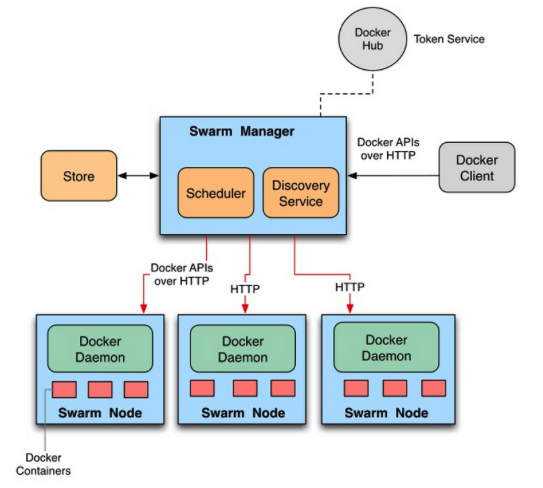
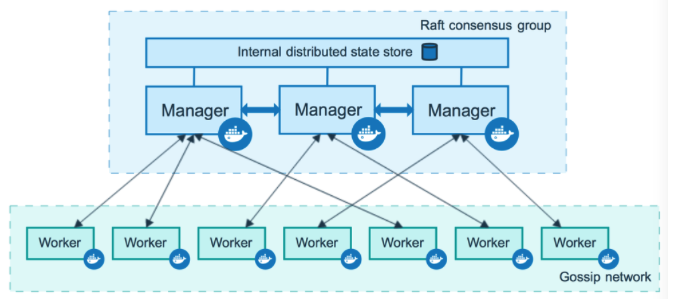
2. Architecture
2.1 Architecture
2.2 Concepts
node: A node is a docker host with a docker engine running on it.
The manager node is responsible for managing the nodes in the cluster and assigning tasks to the worker nodes.
worker nodes receive tasks from the manager node and run them
docker node ls
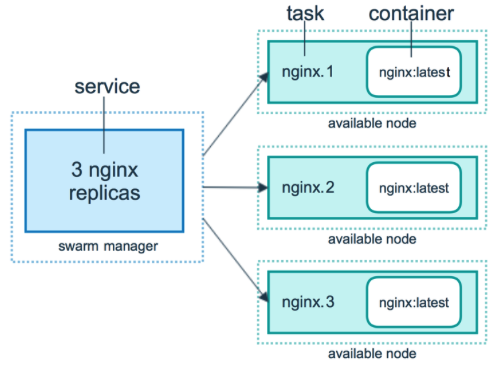
services: those that run on a worker node and consist of multiple tasks together
docker service ls
task: a container or container containing an application running on a worker node, the smallest management unit in the cluster for scheduling
3. Cluster deployment
We are going to use 5 virtual machines (3 masters and 2 nodes), for registry, we are going to use docker hub.
3.1 Host machine preparation
3.1.1 Hostname
hostnamectl set-hostname xxx
master-1
master-2
master-3
node-1
node-2
3.1.2 Ip Address
It is highly recommended to use static ip for each of your machine, here are all the five ips of my machines:
10.211.55.40       master-1
10.211.55.41       master-2
10.211.55.42       master-3
10.211.55.43       node-1
10.211.55.44       node-2
If you do not know how to configure ip address for you machine, you can search for it on the Internet, as different Linux distros have different configuration paths.
3.1.3 Hosts
On each machine, add the following lines to the file: (in iTerm you can use command+shift+i to trigger multi-session input at the same time)
vim /etc/hosts
-----------------------
10.211.55.40       master-1
10.211.55.41       master-2
10.211.55.42       master-3
10.211.55.43       node-1
10.211.55.44       node-2
3.1.4 Time sync
You can use crontab to schedule a ntp time sync job on your machines from a same ntp server to ensure their times are the same.
3.1.5 Security config
Turn off firewalld:
systemctl stop firewalld;systemctl disable firewalld
firewall-cmd --state
----------------------
not running
Turn off Selinux:
vim /etc/selinux/config
---------------------
SELINUX=disabled

reboot

sestatus
--------------
SELinux status:                 disabled
3.2 Install docker on each machine
3.2.1 Install docker using official script
I highly recommend you guys to use a bash script provided by docker official to install docker in one go, this method is super efficient! You can find the script here:
curl -fsSL https://get.docker.com -o get-docker.sh
Then you can execute the script at the same time on five machines:
./get-docker.sh
3.3 Initialise docker swarm cluster
3.3.1 Get help
docker swarm --help
-----------------------
Usage:  docker swarm COMMAND

Manage Swarm

Commands:
  ca          Display and rotate the root CA
  init        Initialize a swarm
  join        Join a swarm as a node and/or manager
  join-token  Manage join tokens
  leave       Leave the swarm
  unlock      Unlock swarm
  unlock-key  Manage the unlock key
  update      Update the swarm
3.3.2 Initialise on master-1
docker swarm init --advertise-addr 10.211.55.40 --listen-addr 10.211.55.40:2377
---------------------------------------------------------------------------------
Swarm initialized: current node (b30qye62ravcqvvp5og2w296n) is now a manager.

To add a worker to this swarm, run the following command:

    docker swarm join --token SWMTKN-1-5bdzw040xzyvgngjsydxok9ssexpbacbqxupo54tmsdoflptld-2uibzfxj1bxuako12dl97q2zc 10.211.55.40:2377

To add a manager to this swarm, run 'docker swarm join-token manager' and follow the instructions.
Tip:
--advertise-addr: When a host has more than one NIC, use it to select one of them for broadcasting and for other nodes to connect to the management node.
--listen-addr: Listening address, used to carry cluster traffic.
3.3.3 Add worker nodes to the cluster
On worker nodes, you can use the command generated on the master node where we init the culster:
docker swarm join --token SWMTKN-1-5bdzw040xzyvgngjsydxok9ssexpbacbqxupo54tmsdoflptld-2uibzfxj1bxuako12dl97q2zc 10.211.55.40:2377
-------------------
This node joined a swarm as a worker.
On master node, we can check nodes in the cluster:
docker node ls
--------------------
ID                            HOSTNAME   STATUS    AVAILABILITY   MANAGER STATUS   ENGINE VERSION
b30qye62ravcqvvp5og2w296n *   master-1   Ready     Active         Leader           23.0.6
yy7bibhaw0a3vswc7l82dqfps     master-2   Ready     Active         Reachable        23.0.6
q4kc27m3rb81ajbdwkdte9d5w     master-3   Ready     Active         Reachable        23.0.6
bzwuq5k0vtnnmjc1k8ww7cmgu     node-1     Ready     Active                          23.0.6
m8p46ndat5bezjopd0i3rwdzp     node-2     Ready     Active                          23.0.6
If your token has expired, you can re-generate them using the following commands:
for worker's join
docker swarm join-token worker
------------------------
To add a worker to this swarm, run the following command:

    docker swarm join --token SWMTKN-1-5bdzw040xzyvgngjsydxok9ssexpbacbqxupo54tmsdoflptld-2uibzfxj1bxuako12dl97q2zc 10.211.55.40:2377
3.3.4 Add manager nodes to the cluster
for manager's join:
docker swarm join-token manager
------------------------
To add a manager to this swarm, run the following command:

    docker swarm join --token SWMTKN-1-5bdzw040xzyvgngjsydxok9ssexpbacbqxupo54tmsdoflptld-e1ubhg0q6l6uvsso0ad60dhyq 10.211.55.40:2377
3.3.5 Failure of simulated management nodes
3.3.5.1 Stop docker service on master-2
systemctl stop docker
-------------------
Warning: Stopping docker.service, but it can still be activated by:
  docker.socket
Check node list on master-1
docker node ls
-------------------------
ID                            HOSTNAME   STATUS    AVAILABILITY   MANAGER STATUS   ENGINE VERSION
b30qye62ravcqvvp5og2w296n *   master-1   Ready     Active         Leader           23.0.6
yy7bibhaw0a3vswc7l82dqfps     master-2   Down      Active         Unreachable      23.0.6
q4kc27m3rb81ajbdwkdte9d5w     master-3   Ready     Active         Reachable        23.0.6
bzwuq5k0vtnnmjc1k8ww7cmgu     node-1     Ready     Active                          23.0.6
m8p46ndat5bezjopd0i3rwdzp     node-2     Ready     Active                          23.0.6
the second manager became 'Unreachable'.
3.3.5.2 Restart docker service on master-2
systemctl start docker
If you chekc on master-1 again, it bacame 'reachable' again:
ID                            HOSTNAME   STATUS    AVAILABILITY   MANAGER STATUS   ENGINE VERSION
b30qye62ravcqvvp5og2w296n *   master-1   Ready     Active         Leader           23.0.6
yy7bibhaw0a3vswc7l82dqfps     master-2   Ready     Active         Reachable        23.0.6
q4kc27m3rb81ajbdwkdte9d5w     master-3   Ready     Active         Reachable        23.0.6
bzwuq5k0vtnnmjc1k8ww7cmgu     node-1     Ready     Active                          23.0.6
m8p46ndat5bezjopd0i3rwdzp     node-2     Ready     Active                          23.0.6
4. Deploy apps using docker swarm cluster
4.1 Prepare two different images
I am going to build two nginx images on my local machine and push them to my docker hub. Then on my linux machines, I will pull the two images using docker pull.
4.1.1 nginx-v1
Index.html for v1:
v1
Dockerfile for v1:
FROM nginx:latest

ADD index.html /usr/share/nginx/html/index.html

RUN echo "daemon off;" >> /etc/nginx/nginx.conf

EXPOSE 80

CMD /usr/sbin/nginx
Build image:
docker build -t nginx:v1 .
Tag image:
docker tag nginx:v1 clarence98/nginx:v1
Push image:
docker push clarence98/nginx:v1
4.1.2 nginx-v2
Just change the index.html's content to:
v2
The rest steps are the same as v1.
4.2 Publish service
In docker swarm, the external exposure is the service, not the container. To maintain a high availability architecture, it allows multiple containers to be launched simultaneously to jointly support a service, and if one container failed, it will automatically use another one.
Now we are on master-1.
4.2.1 Use docker service ls to check service list
ID NAME MODE REPLICAS IMAGE PORTS
Now we do not have any services.
4.2.2 Publish the service
docker service create --name nginx-v1 --replicas 1 --publish 80:80 clarence98/nginx:v1
-------------------------
image clarence98/nginx:v1 could not be accessed on a registry to record
its digest. Each node will access clarence98/nginx:v1 independently,
possibly leading to different nodes running different
versions of the image.

j1h21515n4tnavanq7cg39tu5
overall progress: 1 out of 1 tasks
1/1: running   [==================================================>]
verify: Service converged
4.2.3 Check service again
docker service ls
---------------------------------
ID             NAME       MODE         REPLICAS   IMAGE                 PORTS
j1h21515n4tn   nginx-v1   replicated   1/1        clarence98/nginx:v1   *:80->80/tcp
4.2.4 Check published containers
docker service ps nginx-v1
------------------------------------
ID             NAME         IMAGE                 NODE      DESIRED STATE   CURRENT STATE                    ERROR     PORTS
0j26r514umyu   nginx-v1.1   clarence98/nginx:v1   node-2    Running         Running less than a second ago
As you can see, it tells you where the container is, although we executed the command on master-1, but the actual container is running on node-2!
If you do docker ps on master-1, there will be nothing:
docker ps
---------------------
CONTAINER ID   IMAGE     COMMAND   CREATED   STATUS    PORTS     NAMES
4.2.5 Access the published service on each node in the cluster
[root@master-1 ~]# curl master-1
v1
[root@master-1 ~]# curl master-2
v1
[root@master-1 ~]# curl master-3
v1
[root@master-1 ~]# curl node-1
v1
[root@master-1 ~]# curl node-2
v1
You can also access this service on your local machine in browser:
4.3 Scale up
We can sue 'scale' command to specify the number of replicas:
docker service scale nginx-v1=2
-------------------------
nginx-v1 scaled to 2
overall progress: 2 out of 2 tasks
1/2: running   [==================================================>]
2/2: running   [==================================================>]
verify: Service converged
docker service ps nginx-v1
---------------------------------
ID             NAME         IMAGE                 NODE       DESIRED STATE   CURRENT STATE                    ERROR     PORTS
0j26r514umyu   nginx-v1.1   clarence98/nginx:v1   node-2     Running         Running less than a second ago
vm2oygsyng06   nginx-v1.2   clarence98/nginx:v1   master-3   Running         Running less than a second ago
Another container is up on master-3 node!
Let's try to scale it up to 5 replicas:
docker service scale nginx-v1=5
----------------------
nginx-v1 scaled to 5
overall progress: 5 out of 5 tasks
1/5: running   [==================================================>]
2/5: running   [==================================================>]
3/5: running   [==================================================>]
4/5: running   [==================================================>]
5/5: running   [==================================================>]
verify: Service converged
docker service ps nginx-v1
-------------------
ID             NAME         IMAGE                 NODE       DESIRED STATE   CURRENT STATE                    ERROR     PORTS
0j26r514umyu   nginx-v1.1   clarence98/nginx:v1   node-2     Running         Running less than a second ago
vm2oygsyng06   nginx-v1.2   clarence98/nginx:v1   master-3   Running         Running less than a second ago
82pdk7cjw97y   nginx-v1.3   clarence98/nginx:v1   node-1     Running         Running less than a second ago
lbygy6r66n7b   nginx-v1.4   clarence98/nginx:v1   master-2   Running         Running less than a second ago
9ivacz7oj4on   nginx-v1.5   clarence98/nginx:v1   master-1   Running         Running 35 seconds ago
Now, every node on the cluster has a container for that service! (load balancing)
4.4 Scale down
Let's scale it down back to 1 replica:
docker service scale nginx-v1=1
----------------
nginx-v1 scaled to 1
overall progress: 1 out of 1 tasks
1/1: running   [==================================================>]
verify: Service converged
Check:
docker service ps nginx-v1
---------------------
ID             NAME         IMAGE                 NODE      DESIRED STATE   CURRENT STATE                    ERROR     PORTS
0j26r514umyu   nginx-v1.1   clarence98/nginx:v1   node-2    Running         Running less than a second ago
It will only keep the first container on node-2.
4.5 Load balancing
Next, to verify loda balancing, we can try to scale the service up to 10 replicas:
docker service scale nginx-v1=10
----------------------------
nginx-v1 scaled to 10
overall progress: 10 out of 10 tasks
1/10: running   [==================================================>]
2/10: running   [==================================================>]
3/10: running   [==================================================>]
4/10: running   [==================================================>]
5/10: running   [==================================================>]
6/10: running   [==================================================>]
7/10: running   [==================================================>]
8/10: running   [==================================================>]
9/10: running   [==================================================>]
10/10: running   [==================================================>]
verify: Service converged
Check:
docker service ps nginx-v1
--------------------------------
ID             NAME          IMAGE                 NODE       DESIRED STATE   CURRENT STATE                    ERROR     PORTS
0j26r514umyu   nginx-v1.1    clarence98/nginx:v1   node-2     Running         Running less than a second ago
trpxudn0iqah   nginx-v1.2    clarence98/nginx:v1   node-2     Running         Running less than a second ago
532vr83k7kw3   nginx-v1.3    clarence98/nginx:v1   node-1     Running         Running less than a second ago
nrhrf8rc4ne5   nginx-v1.4    clarence98/nginx:v1   master-1   Running         Running 37 seconds ago
82c9x000wbv6   nginx-v1.5    clarence98/nginx:v1   master-1   Running         Running 37 seconds ago
qqslqyundo2y   nginx-v1.6    clarence98/nginx:v1   master-3   Running         Running less than a second ago
yxfsww9sjj20   nginx-v1.7    clarence98/nginx:v1   master-3   Running         Running less than a second ago
kk0kk34azber   nginx-v1.8    clarence98/nginx:v1   master-2   Running         Running less than a second ago
jtl8k0ll1axs   nginx-v1.9    clarence98/nginx:v1   node-1     Running         Running less than a second ago
6mzhg9fa09d4   nginx-v1.10   clarence98/nginx:v1   master-2   Running         Running less than a second ago
As you can see from the result, 10 containers will be distributed evenly on 5 nodes!
4.6 Delete service
To delete a service, we can use rm and service id to remove it quickly:
docker service ls
----------------
ID             NAME       MODE         REPLICAS   IMAGE                 PORTS
j1h21515n4tn   nginx-v1   replicated   10/10      clarence98/nginx:v1   *:80->80/tcp
docker service rm j1h21
--------------------
j1h21
ID NAME MODE REPLICAS IMAGE PORTS
4.7 Update service version
Let's run a service first, as we deleted in the last step:
docker service create --name nginx-svc --replicas=1 --publish 80:80 clarence98/nginx:v1
----------------------
overall progress: 1 out of 1 tasks
1/1: running   [==================================================>]
verify: Service converged
curl master-1
-----------------
v1
Now we are going to update the service to v2:
docker service update nginx-svc --image clarence98/nginx:v2
------------------
nginx-svc
overall progress: 1 out of 1 tasks
1/1: running   [==================================================>]
verify: Service converged
curl master-1
------------------
v2
4.8 Rollback
To rollback, we still use the update command:
docker service update nginx-svc --image clarence98/nginx:v1
4.9 Service version rolling interval updates
First, let's create a service with 20 replicas using image nginx:v1:
docker service create --name nginx-svc --replicas 20 --publish 80:80 clarence98/nginx:v1
---------------------------
4uin2r3he4x5mpe7vaeyujyyn
overall progress: 20 out of 20 tasks
1/20: running   [==================================================>]
2/20: running   [==================================================>]
3/20: running   [==================================================>]
4/20: running   [==================================================>]
5/20: running   [==================================================>]
6/20: running   [==================================================>]
7/20: running   [==================================================>]
8/20: running   [==================================================>]
9/20: running   [==================================================>]
10/20: running   [==================================================>]
11/20: running   [==================================================>]
12/20: running   [==================================================>]
13/20: running   [==================================================>]
14/20: running   [==================================================>]
15/20: running   [==================================================>]
16/20: running   [==================================================>]
17/20: running   [==================================================>]
18/20: running   [==================================================>]
19/20: running   [==================================================>]
20/20: running   [==================================================>]
verify: Service converged
Second, let's update this service using v2 image, set a delay:
docker service update --replicas 20 --image clarence98/nginx:v2 --update-parallelism 5 --update-delay 30s nginx-svc
-----------------------
While it is updating, continuously visit the machine, you will get this:
[root@master-2 ~]# curl master-2
v2
[root@master-2 ~]# curl master-2
v2
[root@master-2 ~]# curl master-2
v2
[root@master-2 ~]# curl master-2
v2
[root@master-2 ~]# curl master-2
v1
[root@master-2 ~]# curl master-2
v1
[root@master-2 ~]# curl master-2
v1
After the updating:
nginx-svc
overall progress: 20 out of 20 tasks
1/20: running   [==================================================>]
2/20: running   [==================================================>]
3/20: running   [==================================================>]
4/20: running   [==================================================>]
5/20: running   [==================================================>]
6/20: running   [==================================================>]
7/20: running   [==================================================>]
8/20: running   [==================================================>]
9/20: running   [==================================================>]
10/20: running   [==================================================>]
11/20: running   [==================================================>]
12/20: running   [==================================================>]
13/20: running   [==================================================>]
14/20: running   [==================================================>]
15/20: running   [==================================================>]
16/20: running   [==================================================>]
17/20: running   [==================================================>]
18/20: running   [==================================================>]
19/20: running   [==================================================>]
20/20: running   [==================================================>]
verify: Service converged
It will be totally changed to v2, we will never see v1:
[root@master-2 ~]# curl master-2
v2
[root@master-2 ~]# curl master-2
v2
[root@master-2 ~]# curl master-2
v2
[root@master-2 ~]# curl master-2
v2
[root@master-2 ~]# curl master-2
v2
4.10 Replica control
In this section, I will demonstrate how it control replicas in a service.
First, let's create a service:
docker service create --name nginx-svc --replicas 5 --publish 80:80 clarence98/nginx:v1

docker service ps nginx-svc
---------------------------------
ID             NAME          IMAGE                 NODE       DESIRED STATE   CURRENT STATE                ERROR     PORTS
e2f8zvmc7e9j   nginx-svc.1   clarence98/nginx:v1   node-1     Running         Running about a minute ago
jp1kdbn2q5ye   nginx-svc.2   clarence98/nginx:v1   node-2     Running         Running about a minute ago
vlvae1k1cz2k   nginx-svc.3   clarence98/nginx:v1   master-3   Running         Running about a minute ago
l5b69n4fu9sh   nginx-svc.4   clarence98/nginx:v1   master-2   Running         Running about a minute ago
v63ejfqc7gm9   nginx-svc.5   clarence98/nginx:v1   master-1   Running         Running about a minute ago
If we delete a container on node-1, what will happen?
This is the container list on node-1:
[root@node-1 ~]# docker ps
CONTAINER ID   IMAGE                 COMMAND                  CREATED         STATUS         PORTS     NAMES
35ef60dfe293   clarence98/nginx:v1   "/docker-entrypoint.…"   3 minutes ago   Up 3 minutes   80/tcp    nginx-svc.1.e2f8zvmc7e9j76854qmhiy57j
Delete it:
[root@node-1 ~]# docker container rm -f 35ef60dfe293
35ef60dfe293
Check the list again, you can see a new one has been created:
[root@node-1 ~]# docker ps
CONTAINER ID   IMAGE                 COMMAND                  CREATED          STATUS          PORTS     NAMES
f371a4205f60   clarence98/nginx:v1   "/docker-entrypoint.…"   50 seconds ago   Up 45 seconds   80/tcp    nginx-svc.1.s28e5856gvyyez7odp9rzg4xs
Go back to master-1 and check services, the master node discoverd this failure as well:
[root@master-1 ~]# docker service ps nginx-svc
ID             NAME              IMAGE                 NODE       DESIRED STATE   CURRENT STATE           ERROR PORTS
s28e5856gvyy   nginx-svc.1       clarence98/nginx:v1   node-1     Running         Running 1 second ago
e2f8zvmc7e9j    \_ nginx-svc.1   clarence98/nginx:v1   node-1     Shutdown        Failed 7 seconds ago    "task: non-zero exit (137)"
jp1kdbn2q5ye   nginx-svc.2       clarence98/nginx:v1   node-2     Running         Running 4 minutes ago
vlvae1k1cz2k   nginx-svc.3       clarence98/nginx:v1   master-3   Running         Running 4 minutes ago
l5b69n4fu9sh   nginx-svc.4       clarence98/nginx:v1   master-2   Running         Running 4 minutes ago
v63ejfqc7gm9   nginx-svc.5       clarence98/nginx:v1   master-1   Running         Running 4 minutes ago
4.11 Publish a service in a specified network
4.11.1 Overlay network
Docker overlay network is a type of overlay network that is built on top of an existing Docker swarm cluster. It enables communication between different services or containers running in the swarm, regardless of which node they are deployed on.
4.11.2 Publish a service on an overlay network
Let's create a network firstly:
[root@master-1 ~]# docker network create -d overlay tomcat-network
i4aucrscehaxqor84ilk3nwlq
[root@master-1 ~]# docker network ls
NETWORK ID     NAME              DRIVER    SCOPE
b3ee94a3dbdf   bridge            bridge    local
e0a45258dc2a   docker_gwbridge   bridge    local
930ecbde294b   host              host      local
zi42khxwibr0   ingress           overlay   swarm
f30224360f67   none              null      local
i4aucrscehax   tomcat-network    overlay   swarm
Then create a tomcat service in this network:
docker service create --name tomcat \
--network tomcat-network \
-p 8080:8080 \
--replicas 3 \
tomcat
[root@master-1 ~]# docker service ps tomcat
ID             NAME       IMAGE           NODE       DESIRED STATE   CURRENT STATE                ERROR     PORTS
pvaquwsx1hv2   tomcat.1   tomcat:latest   node-2     Running         Running about a minute ago
kjv55355map9   tomcat.2   tomcat:latest   master-1   Running         Running about a minute ago
mjwnlszkjauk   tomcat.3   tomcat:latest   node-1     Running         Running about a minute ago
On my host machine, open chrome and type http://master-1:8080:
(since I did not deploy anything on it, it returns a 404 page)
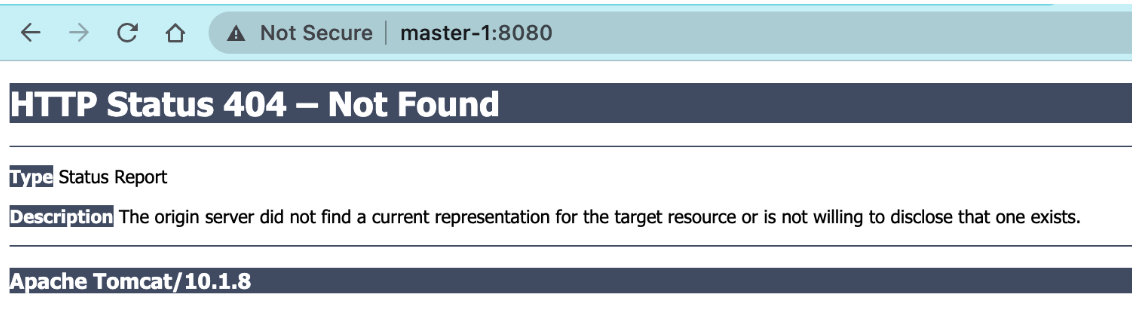
We can also explore hosts in the network, these 3 hosts represents where the 3 replicas are deployed:
 docker network inspect tomcat-network
 ---------------------------
 "Peers": [
            {
                "Name": "0ca9cdf2914b",
                "IP": "10.211.55.40"
            },
            {
                "Name": "404965d5581f",
                "IP": "10.211.55.43"
            },
            {
                "Name": "77a081d2a95b",
                "IP": "10.211.55.44"
            }
        ]
4.12 Two network modes
4.12.1 Ingress mode
Docker Swarm Ingress mode is a built-in routing mesh feature in Docker that provides a simple and flexible way to route traffic to services running in a Docker Swarm cluster. Ingress mode allows you to expose services to the outside world and distribute incoming traffic across all nodes in the swarm, without requiring any external load balancers or reverse proxies.
Let's take the 3 tomcat replicas in the above section as an example. The 3 containers are running on master-1, node-1, and node-2, but if we visit master-2 or master-3, which have no service on it, what will happen?
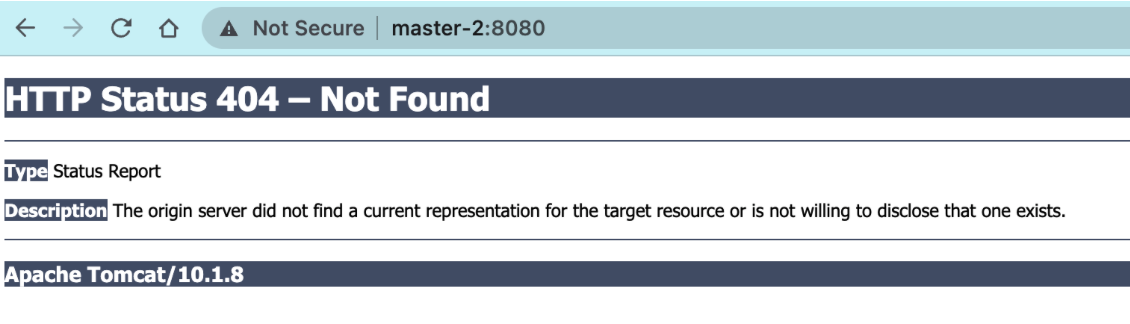
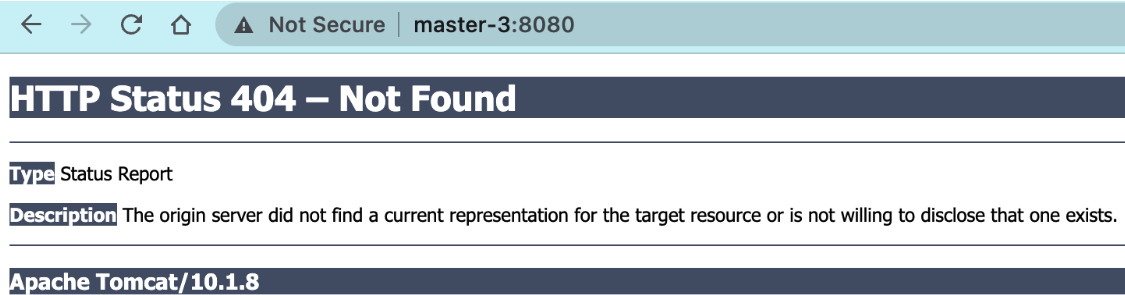
You can also access to the service, because this service is deployed under 'Ingress' mode, by default, services will be deployed under this mode.
When you create a service in Docker Swarm with ingress mode enabled, Docker automatically creates a virtual IP address (VIP) for the service, which serves as the entry point to the swarm. The VIP is a floating IP address that is assigned to one of the nodes in the swarm, and it can be used to access the service from any node in the swarm, as well as from external clients.
We can check details using this command:
[root@master-1 ~]# docker service inspect tomcat
...
...
"VirtualIPs": [
    {
        "NetworkID": "zi42khxwibr0uv2pctscp2gpf",
        "Addr": "10.0.0.200/24"
    },
    {
        "NetworkID": "i4aucrscehaxqor84ilk3nwlq",
        "Addr": "10.0.1.82/24"
    }
]
If you inspect the container on master-1:
[root@master-1 ~]# docker inspect b1769907a6fc
...
...
"Networks": {
    "ingress": {
        "IPAMConfig": {
            "IPv4Address": "10.0.0.203"
        },
        "Links": null,
        "Aliases": [
            "b1769907a6fc"
        ],
        "NetworkID": "zi42khxwibr0uv2pctscp2gpf",
        "EndpointID": "3b4cd9c23ae2eab2140f61320ab5ab0ba105dbc9f47bdd12063715a4166f7380",
        "Gateway": "",
        "IPAddress": "10.0.0.203",
        "IPPrefixLen": 24,
        "IPv6Gateway": "",
        "GlobalIPv6Address": "",
        "GlobalIPv6PrefixLen": 0,
        "MacAddress": "02:42:0a:00:00:cb",
        "DriverOpts": null
    },
    "tomcat-network": {
        "IPAMConfig": {
            "IPv4Address": "10.0.1.85"
        },
        "Links": null,
        "Aliases": [
            "b1769907a6fc"
        ],
        "NetworkID": "i4aucrscehaxqor84ilk3nwlq",
        "EndpointID": "314558170a525ba0ff92fc1ab632e8d9a392e1df9aea48ee62e4965e02efce66",
        "Gateway": "",
        "IPAddress": "10.0.1.85",
        "IPPrefixLen": 24,
        "IPv6Gateway": "",
        "GlobalIPv6Address": "",
        "GlobalIPv6PrefixLen": 0,
        "MacAddress": "02:42:0a:00:01:55",
        "DriverOpts": null
    }
}
The two are overlay networks created in the Docker Swarm cluster:
"ingress": This is a built-in overlay network in Docker that provides internal load balancing for Swarm services. All services that have ingress mode enabled are automatically connected to this network. The IP address10.0.0.203assigned to this network is the virtual IP (VIP) address for the service, which serves as the entry point to the swarm. The VIP is a floating IP address that is automatically assigned by Docker and can be used to access the service from any node in the swarm, as well as from external clients."tomcat-network": This is another overlay network that has been manually created in the Docker Swarm cluster. It is namedtomcat-networkand has an IP address range of10.0.1.0/24. The IP address10.0.1.85assigned to this network is the IP address for the container on this network. Containers that are attached to this network can communicate with each other using their IP addresses. You can create and attach custom overlay networks to your services to isolate them from other services in the swarm.
In summary, overlay networks are used in Docker Swarm for container communication and service discovery across different hosts in the cluster. They provide transparent connectivity between containers running on different nodes in the cluster, allowing you to deploy distributed applications that can scale horizontally and handle high availability and failover scenarios.
4.12.2 Host mode
Under host mode, we can only access to the service using the host machine's name/ip, only those hosts that have services running on it can be accessed, if there is no container on a host, even if the host is in the cluster, we will not be able to visit the service through that host.
To create services under host mode, simply add an argument:
docker service create --name tomcat \
--network tomcat-network \
--publish published=8080,target=8080,mode=host \
--replicas 3 \
tomcat
[root@master-1 ~]# docker service ps tomcat
ID             NAME       IMAGE           NODE       DESIRED STATE   CURRENT STATE            ERROR     PORTS
izct4vf5hfoe   tomcat.1   tomcat:latest   master-3   Running         Running 25 seconds ago             *:8080->8080/tcp,*:8080->8080/tcp
37rtkydq5s1b   tomcat.2   tomcat:latest   master-2   Running         Running 24 seconds ago             *:8080->8080/tcp,*:8080->8080/tcp
lwhcta48jc7y   tomcat.3   tomcat:latest   master-1   Running         Running 22 seconds ago             *:8080->8080/tcp,*:8080->8080/tcp
As we can see, three replicas are deployed on three master machines, let's try to visit node machines:
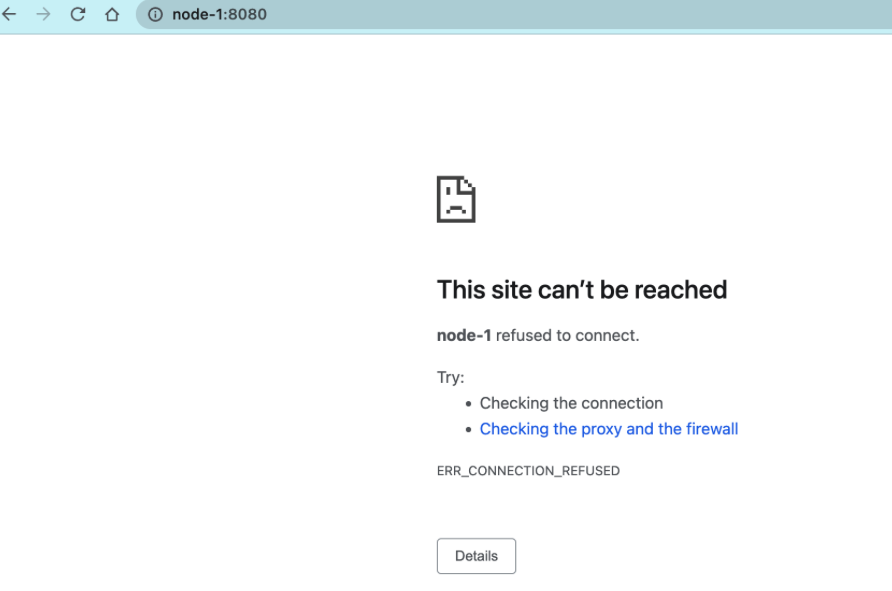
This is what we expected :)
4.13 Service data persistent storage
There are two solutions, but the first solution has an issue.
4.13.1 Solution1: Mount data locally (lack of consistency)
As each host is an individual machine, and we may deploy multiple instances of the same application on different hosts, if we directly mount the file storage system onto their local disks, it becomes challenging to maintain data consistency among them. This can lead to discrepancies for users when they visit the same application from different hosts. While it is still possible to implement data persistence in this manner, it is not recommended due to the potential issues with data synchronization and consistency between the hosts.
# make a directory to store app data
mkdir /opt/app_data

# run an nginx service with 3 replicas, mount data on this directory
docker service create --name nginx-svc \
--replicas 3 \
--mount "type=bind,source=/opt/app_data,target=/usr/share/nginx/html" \
--publish 80:80 \
clarence98/nginx:v1
After executing the deployment command, three containers will be deployed on three hosts in the cluster. Initially, all three replicas have the same index page. However, if the content of the index file is manually changed on one container, users may receive different results due to load balancing.
4.13.2 Solution2: Network storage (ensure consistency)
Here I will show you an example using NFS (Network File System).
4.13.2.1 Deploy an NFS server on one node:
I am going to deploy NFS on master-1:
- Install nfs server package:
sudo dnf update -y
sudo dnf install nfs-utils -y
- Create a directory that will be shared by nfs:
sudo mkdir -p /var/nfs/general
- Edit the
/etc/exportsfile to make the directory available to the client systems:
vim /etc/exports
--------------------
/var/nfs/general    *(rw,sync,no_subtree_check)
- Export the shared directory:
sudo exportfs -a
- Enable and start the nfs server:
sudo systemctl enable nfs-server.service
sudo systemctl start nfs-server.service
4.13.2.2 Set up NFS clients on other machines:
- Install the NFS client package:
sudo dnf update -y
sudo dnf install nfs-utils -y
- Create a directory where the NFS shared files will be mounted:
sudo mkdir -p /mnt/nfs/general
- Mount the shared NFS directory at the client:
sudo mount master-1:/var/nfs/general /mnt/nfs/general
- To make sure the NFS share is mounted automatically after a reboot, add the following line in the
/etc/fstabfile:
master-1:/var/nfs/general /mnt/nfs/general nfs auto,nofail,noatime,nolock,intr,tcp,actimeo=1800 0 0
4.13.2.3 Start service (all commands are executed on master-1):
- Create:
docker service create \
  --name nginx \
  --replicas 3 \
  --constraint 'node.role==worker' \
  --publish published=80,target=80 \
  --mount type=bind,source=/mnt/nfs/general,destination=/usr/share/nginx/html \
  nginx:latest


image nginx:latest could not be accessed on a registry to record
its digest. Each node will access nginx:latest independently,
possibly leading to different nodes running different
versions of the image.

nf823meuton7008h4skywr7pn
overall progress: 3 out of 3 tasks
1/3: running   [==================================================>]
2/3: running   [==================================================>]
3/3: running   [==================================================>]
verify: Service converged
- Check:
docker service ls
ID             NAME      MODE         REPLICAS   IMAGE          PORTS
nf823meuton7   nginx     replicated   3/3        nginx:latest   *:80->80/tcp
docker service ps nf
ID             NAME      IMAGE          NODE      DESIRED STATE   CURRENT STATE           ERROR     PORTS
ki5dboud5yxl   nginx.1   nginx:latest   node-1    Running         Running 2 minutes ago
nrnrumh8f2f5   nginx.2   nginx:latest   node-2    Running         Running 2 minutes ago
k3cenh3e9yw6   nginx.3   nginx:latest   node-1    Running         Running 2 minutes ago
- Curl:
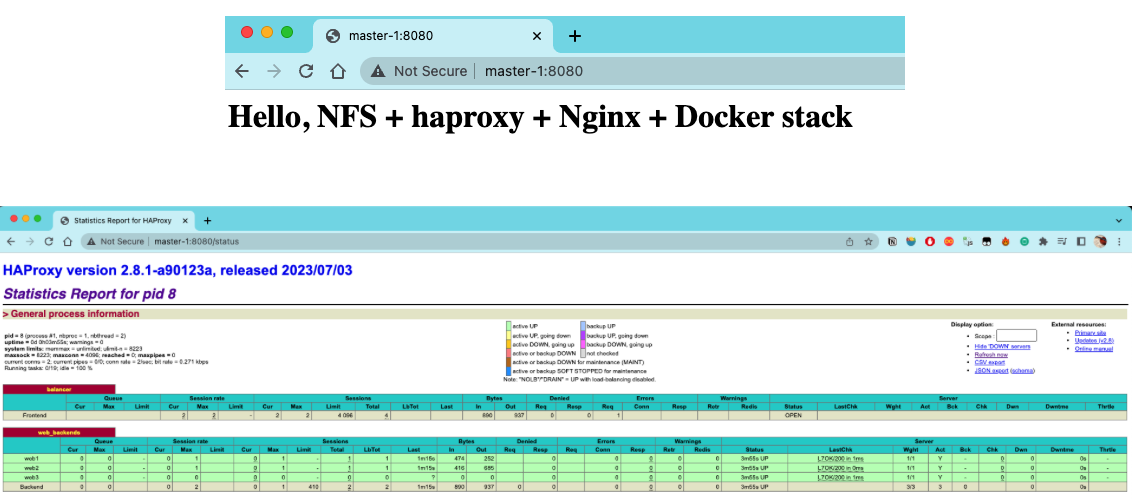
curl master-1

<html>
<head><title>403 Forbidden</title></head>
<body>
<center><h1>403 Forbidden</h1></center>
<hr><center>nginx/1.25.1</center>
</body>
</html>
Here, we got a 403 error code because we didn't add any index file in the nfs, let's add something now:
echo "<h1>Hello, NFS + Nginx + Docker Swarm Cluster</h1>" > /var/nfs/general/index.html
Try again using different hosts in the cluster:
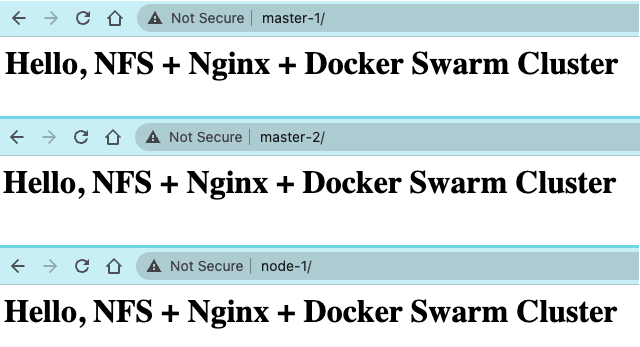
Perfect! In this way, we can ensure the data persistency across hosts in a docker swarm cluster!
4.14 Service Discovery
4.14.1 Problem
Assuming you are going to deploy a MySQL database, how would you make sure that other services on other hosts can get access to this database? Publishing the database is a simple solution, but it has security issues as everyone can access to the database. We can use overlay network type here.
4.14.2 Create an overlay network on the cluster
On master-1 node:
docker network create --driver=overlay --subnet=1.1.1.0/24 my-overlay
z2figuhqwo06uul3o7fd4sen0
docker network ls
NETWORK ID     NAME              DRIVER    SCOPE
2610797394b2   bridge            bridge    local
e0a45258dc2a   docker_gwbridge   bridge    local
930ecbde294b   host              host      local
zi42khxwibr0   ingress           overlay   swarm
z2figuhqwo06   my-overlay        overlay   swarm  ### the net work we created just now
fd9mc764ybh4   nginx_default     overlay   swarm
f30224360f67   none              null      local
i4aucrscehax   tomcat-network    overlay   swarm
We can also find this network on other master machines, but not node machines.
4.14.3 Deploy two simple services
- Deploy a simple nginx service:
docker service create --name=nginx-svc --replicas=2 --publish=80:80 --network=my-overlay nginx
image nginx:latest could not be accessed on a registry to record
its digest. Each node will access nginx:latest independently,
possibly leading to different nodes running different
versions of the image.

lpq0bfr1apg5d2dgojz9osvzq
overall progress: 2 out of 2 tasks
1/2: running
2/2: running
verify: Service converged
docker service ls
ID             NAME        MODE         REPLICAS   IMAGE          PORTS
lpq0bfr1apg5   nginx-svc   replicated   2/2        nginx:latest   *:80->80/tcp
- Deploy a busybox service:
docker service create --name=busybox-svc --network=my-overlay busybox:latest sleep 100000
image busybox:latest could not be accessed on a registry to record
its digest. Each node will access busybox:latest independently,
possibly leading to different nodes running different
versions of the image.

2x5hxhdd06y5p9duwxpw3izla
overall progress: 1 out of 1 tasks
1/1: running
verify: Service converged
docker service ls
ID             NAME          MODE         REPLICAS   IMAGE            PORTS
2x5hxhdd06y5   busybox-svc   replicated   1/1        busybox:latest
lpq0bfr1apg5   nginx-svc     replicated   2/2        nginx:latest     *:80->80/tcp
4.14.4 Verify the connectivity between two containers on different hosts
- Let's check where the busybox-svc is deployed:
docker service ps busybox-svc
ID             NAME            IMAGE            NODE       DESIRED STATE   CURRENT STATE           ERROR     PORTS
xwc6ffe3b3yh   busybox-svc.1   busybox:latest   master-2   Running         Running 2 minutes ago
It is on master-2, let's go there!
docker ps
CONTAINER ID   IMAGE            COMMAND          CREATED         STATUS         PORTS     NAMES
149600a24e19   busybox:latest   "sleep 100000"   3 minutes ago   Up 3 minutes             busybox-svc.1.xwc6ffe3b3yhjdqcrnwzrw627
- Execute ping command in the busybox container to nginx-svc:
docker exec -it 1496 ping nginx-svc
PING nginx-svc (1.1.1.2): 56 data bytes
64 bytes from 1.1.1.2: seq=0 ttl=64 time=0.299 ms
64 bytes from 1.1.1.2: seq=1 ttl=64 time=0.100 ms
64 bytes from 1.1.1.2: seq=2 ttl=64 time=0.280 ms
64 bytes from 1.1.1.2: seq=3 ttl=64 time=0.245 ms
64 bytes from 1.1.1.2: seq=4 ttl=64 time=0.241 ms
64 bytes from 1.1.1.2: seq=5 ttl=64 time=0.063 ms
^C
--- nginx-svc ping statistics ---
6 packets transmitted, 6 packets received, 0% packet loss
round-trip min/avg/max = 0.063/0.204/0.299 ms
What is this ip address we saw from above? "1.1.1.2". Let's check the two replicas of nginx-svc.
docker service ps nginx-svc
ID             NAME          IMAGE          NODE       DESIRED STATE   CURRENT STATE            ERROR     PORTS
7pcao7zpw33i   nginx-svc.1   nginx:latest   node-2     Running         Running 15 minutes ago
l6ow8eal230p   nginx-svc.2   nginx:latest   master-3   Running         Running 15 minutes ago
Go to node-2:
docker ps
CONTAINER ID   IMAGE          COMMAND                  CREATED          STATUS          PORTS     NAMES
3c9b0371aebf   nginx:latest   "/docker-entrypoint.…"   17 minutes ago   Up 17 minutes   80/tcp    nginx-svc.1.7pcao7zpw33i2op2dy4763v5a
docker inspect 3c | grep -i ipaddress
            "SecondaryIPAddresses": null,
            "IPAddress": "",
                    "IPAddress": "10.0.0.11",
                    "IPAddress": "1.1.1.3",
This container's ip is 1.1.1.3, not the one we saw, go to master-3
docker ps
CONTAINER ID   IMAGE          COMMAND                  CREATED          STATUS          PORTS     NAMES
73d544c8e56a   nginx:latest   "/docker-entrypoint.…"   18 minutes ago   Up 18 minutes   80/tcp    nginx-svc.2.l6ow8eal230p5z0qbcg6x60pv
docker inspect 73 | grep -i ipaddress
            "SecondaryIPAddresses": null,
            "IPAddress": "",
                    "IPAddress": "10.0.0.12",
                    "IPAddress": "1.1.1.4",
This is also not the one we want? So... what is the ip 1.1.1.2 we got from ping command?
It is the service's ip!
docker service inspect nginx-svc | grep -i add
                    "Addr": "10.0.0.10/24"
                    "Addr": "1.1.1.2/24"
Conclusion: docker uses service's ip for service discovery, no matter how the number and ip addresses of replica containers change, you can always find the right container by service!
5. Docker stack
5.1 Intro to docker stack
Early on, each service was published individually.
With YAML, multiple services can be published, but when using docker-compose, only one can be deployed on a single host.
A stack is a combination of related services that can be orchestrated, published, and managed together.
5.2 Differences between Docker Stack and Docker Compose
Docker Stack ignores the "build" directive, so it cannot use the stack command to build new images; images need to be pre-built. Hence, Docker Compose is more suitable for development scenarios.
Docker Compose is a Python project. Internally, it uses the Docker API specification to operate containers. Thus, Docker Compose needs to be installed to be used in conjunction with Docker on your computer.
Docker Stack functionality is included in the Docker engine. There's no need to install any extra packages to use it; Docker Stack is just a part of swarm mode.
Docker Stack does not support docker-compose.yml written based on the 2nd version, meaning the version must be at least 3. However, Docker Compose can still handle files with versions 2 and 3.
Docker Stack completes all the tasks of Docker Compose, and hence, Docker Stack will take a dominant position. At the same time, for most users, switching to Docker Stack is neither difficult nor requires too much overhead. If you're a Docker novice, or deciding on technology for a new project, consider using Docker Stack.
5.3 Common Docker Stack Commands
| Command | Description |
| docker stack deploy | Deploy a new stack or update an existing one |
| docker stack ls | List existing stacks |
| docker stack ps | List tasks within a stack |
| docker stack rm | Remove one or more stacks |
| docker stack services | List services within a stack |
5.4 Example 1: deploy wordpress
5.4.1 Create YAML file
vim mysql_wordpress.yaml
version: '3'
services:
  db:
    image: mysql:8.0
    environment:
      MYSQL_ROOT_PASSWORD: wordpress
      MYSQL_DATABASE: wordpress
      MYSQL_USER: wordpress
      MYSQL_PASSWORD: wordpress
    deploy:
      replicas: 1

  wordpress:
    depends_on:
      - db
    image: wordpress:latest
    ports:
      - "8010:80"
    environment:
      WORDPRESS_DB_HOST: db:3306
      WORDPRESS_DB_USER: wordpress
      WORDPRESS_DB_PASSWORD: wordpress
      WORDPRESS_DB_NAME: wordpress
    deploy:
      replicas: 1
      placement:
        constraints: [node.role == manager]
5.4.2 Deploy service
docker stack deploy -c mysql_wordpress.yaml mysql_wordpress
Creating network mysql_wordpress_default
Creating service mysql_wordpress_wordpress
Creating service mysql_wordpress_db
docker stack services mysql_wordpress
ID NAME MODE REPLICAS IMAGE PORTS
m9uw22dbo90p mysql_wordpress_db replicated 1/1 mysql:8.0
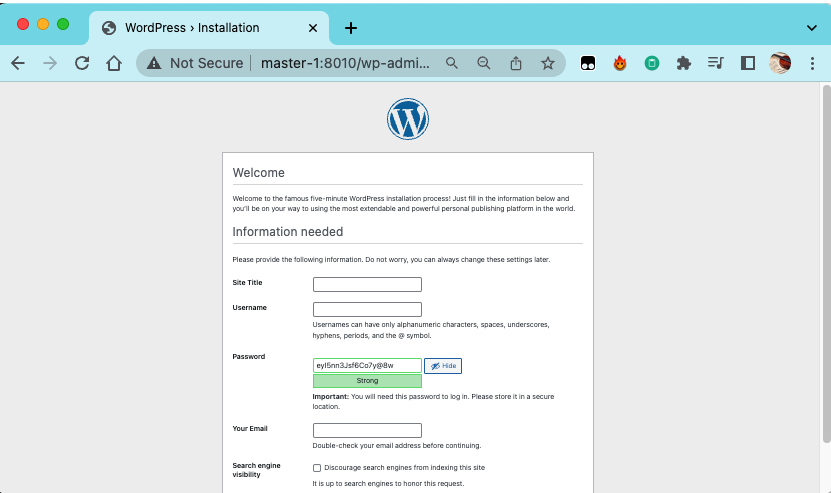
wxu30s9x3h5k mysql_wordpress_wordpress replicated 1/1 wordpress:latest *:8010->80/tcp
5.4.3 Visit the website
5.5 Example 2: Deploy a docker host GUI management platform
5.5.1 YAML file
vim docker_mgnt.yaml
version: "3"
services:
  nginx:
    image: nginx:latest
    ports:
      - 80:80
    deploy:
      mode: replicated
      replicas: 3

  portainer:
    image: portainer/portainer
    ports:
      - "9000:9000"
    volumes:
      - "/var/run/docker.sock:/var/run/docker.sock"
    deploy:
      replicas: 1
      placement:
        constraints: [node.role == manager]
(you can also add a swarm visualizer)
# this only supports amd64!!
  #visualizer:
  #  image: dockersamples/visualizer
  #  ports:
  #    - "9001:8080"
  #  volumes:
  #    - "/var/run/docker.sock:/var/run/docker.sock"
  #  deploy:
  #    replicas: 1
  #    placement:
  #      constraints: [node.role == manager]
5.5.2 Deploy
docker stack deploy -c docker_mgnt.yaml docker_mgnt
docker stack deploy -c docker_mgnt.yaml docker_mgnt
Creating network docker_mgnt_default
Creating service docker_mgnt_nginx
Creating service docker_mgnt_portainer
docker service ls
ID NAME MODE REPLICAS IMAGE PORTS
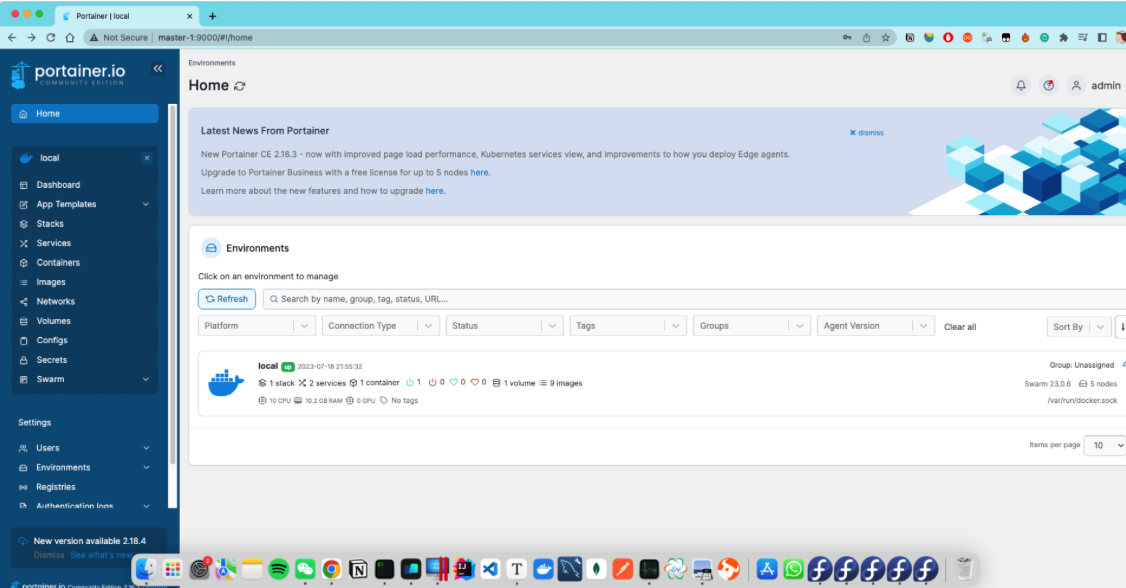
tj4lo43pewq5 docker_mgnt_nginx replicated 3/3 nginx:latest *:80->80/tcp
4poi5niay3p2 docker_mgnt_portainer replicated 1/1 portainer/portainer:latest *:9000->9000/tcp
5.5.3 Verify
5.6 Example 3: Nginx + haproxy + nfs
5.6.1 Prepare config files for haproxy
mkdir -p /docker-stack/haproxy
cd /docker-stack/haproxy/
vim haproxy.cfg

global
  log 127.0.0.1 local0
  log 127.0.0.1 local1 notice
  maxconn 4096

defaults
  log global
  mode http
  option httplog
  option dontlognull
  timeout connect 5000ms
  timeout client 50000ms
  timeout server 50000ms
  stats uri /status

frontend balancer
    bind *:8080
    mode http
    default_backend web_backends

backend web_backends
    mode http
    option forwardfor
    balance roundrobin
    server web1 nginx1:80 check
    server web2 nginx2:80 check
    server web3 nginx3:80 check
    option httpchk GET /
    http-check expect status 200
vim nginx_haproxy.yaml
version: "3"
services:
  nginx1:
    image: nginx
    deploy:
      mode: replicated
      replicas: 1
      restart_policy:
        condition: on-failure
    volumes:
    - "nginx_vol:/usr/share/nginx/html"

  nginx2:
    image: nginx
    deploy:
      mode: replicated
      replicas: 1
      restart_policy:
        condition: on-failure
    volumes:
    - "nginx_vol:/usr/share/nginx/html"

  nginx3:
    image: nginx
    deploy:
      mode: replicated
      replicas: 1
      restart_policy:
        condition: on-failure
    volumes:
    - "nginx_vol:/usr/share/nginx/html"

  haproxy:
    image: haproxy:latest
    volumes:
      - "./haproxy.cfg:/usr/local/etc/haproxy/haproxy.cfg:ro"
    ports:
      - "8080:8080"
    deploy:
      replicas: 1
      placement:
        constraints: [node.role == manager]

volumes:
  nginx_vol:
    driver: local
    driver_opts:
      type: "nfs"
      o: "addr=10.211.55.40,rw"
      device: ":/var/nfs/general"
(here we used the nfs server we created in the last section)
5.6.2 Deploy
docker stack deploy -c nginx_haproxy.yaml nginx_haproxy
Creating network nginx_haproxy_default
Creating service nginx_haproxy_haproxy
Creating service nginx_haproxy_nginx1
Creating service nginx_haproxy_nginx2
Creating service nginx_haproxy_nginx3
docker stack services nginx_haproxy
ID             NAME                    MODE         REPLICAS   IMAGE            PORTS
3v4dk76kjoqb   nginx_haproxy_haproxy   replicated   1/1        haproxy:latest   *:8080->8080/tcp
nxrgyq97ii4w   nginx_haproxy_nginx1    replicated   1/1        nginx:latest
nxrzx466qkr6   nginx_haproxy_nginx2    replicated   1/1        nginx:latest
kouigfe8wy6j   nginx_haproxy_nginx3    replicated   1/1        nginx:latest
5.6.3 Verify